Pin Setup
To get started, log into the Sidos Cloud (app.sidos.com) and create a new Deep Survey
Select the Wave ID you wish to use for this Deep Survey.*
*Note: Each Deep Survey can use only one Wave, and a Wave cannot be active in more than one Deep Survey at the same time.*

[Optional] Select your configuration profile (See "Review Data in Cloud" for setup instructions)
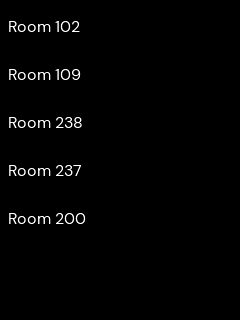
Create and label your location pins, then place them on the map at each spot where you want to capture measurements. For best results, perform a Point Survey at these exact locations, and also run a full Survey using a separate QR code survey. Layering Point Survey measurements on top of the traditional Survey provides richer, more precise data for your Deep Survey.
*Note: There is a max of 64 pins for each Deep Survey
As of March 19, 2026 the pin limit has been increased to 128.

Wave Configuration
Connect your Wave via an Ethernet cable and open the Deep Survey Micro-App on your Wave. If you have previously configured a Deep Survey on that Wave, you will see the previous site's pins initially. Once the Wave communicates the new pin locations will populate.
*Please Note: The Wave will communicate with the cloud on TCP port 56001.
For more on connectivity requirem,ents please see this article.
Survey
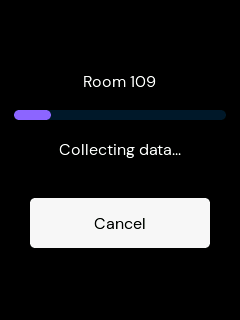
When the operator is ready to survey, they open the Deep Survey Micro App on the Wave. No additional hardware is required. The operator walks to each pin shown in the micro app and, at each location, taps and holds the corresponding pin until the measurement starts and the pin appears active on the screen. If the wrong pin is selected, the operator can cancel the measurement and re-select. This process is repeated until every pin has been measured. A cloud icon appears next to each location once its survey is complete.
Upload Data
Connect your Wave using the Ethernet port and ensure the Deep Survey Micro App is running. Wait for the measurements to finish uploading. A green checkmark will appear next to each pin on the Wave once its data has been successfully uploaded to the cloud.

Review Data in Cloud
Start by selecting the SSID that is desired for review.
Once the data is uploaded to the Sidos Cloud, the results will appear in columns. New columns will be created for each new Deep Survey that are greater than four hours.

In Sidos Cloud, you can configure, adjust, or disable specific parameters and tests, then save these settings as a reusable profile. This profile is shared across your team and can be applied to future analyses, including other Deep Surveys.
To configure tests, click on the “pass”/”fail” icon and use the input menus to add thresholds and parameters to tests.

For deeper analysis, any pin can be selected. This will show all the BSSIDs and APs heard at that exact point, along with a historical record.

Heatmaps
This mode shows how each survey point RSSI compares to the scale set in the bottom right slider. It will also show (if applicable) Primary and Secondary Coverage in the background using the same scale.

Tip: If you select a specific AP, the heatmap will only reflect that AP’s coverage.
Note: Extrapolation is fixed to a maximum of 10 meters in Deep Survey